Introduction to Bathroom Vanity Replacement
Replacing a bathroom vanity is an effective way to enhance both functionality and aesthetics in any bathroom space. A bathroom vanity serves as a key focal point, combining storage and design elements with practicality. Over time, wear and tear, changing decor trends, or a need for improved utility may prompt the need for a replacement. Understanding the process and key steps can make this a manageable and rewarding home improvement project.
Before beginning, it is essential to evaluate the bathroom’s current layout to ensure the new vanity will fit seamlessly. Consider the dimensions of the room, the plumbing configuration, and the clearance needs for doors and drawers. Measurements should be precise to avoid costly errors during installation. The choice of vanity also depends on its intended use. For instance, small bathroom vanity options are ideal for smaller bathrooms, while double-sink options are preferred for shared or larger spaces.
The material of the vanity is another important factor. Choices such as wooden bathroom vanity, MDF (medium-density fibreboard), or engineered quartz countertops offer distinct durability and aesthetic options. Buyers should select materials that align with moisture resistance and daily usage. Additionally, the style should complement the existing theme of the bathroom—from modern minimalist designs to rustic or vintage preferences.
Replacing a vanity involves multiple steps, such as removing the old unit, preparing the plumbing, installing the new vanity base, and securing the sink and faucet. At During Days, Proper tools and supplies, including a wrench, level, and caulking gun, are vital for smooth installation. Taking the time to carefully disconnect utilities like water supply lines prevents accidental damage.
Fitting a new vanity breathes fresh life into the bathroom, offering both improved storage solutions and visual appeal.
Tools and Materials Needed for the Job
Replacing a bathroom vanity requires a range of tools and materials to ensure the process is smooth and efficient. Proper preparation avoids delays and ensures all necessary items are readily available.
Tools Required
- Adjustable spanner: Essential for loosening and tightening plumbing connections without damaging them.
- Screwdrivers: Both flathead and Phillips screwdrivers are necessary for loosening and securing screws during disassembly and installation.
- Pry bar: Useful for gently removing old vanities or any trim without causing damage to the surrounding surfaces.
- Caulking gun: Needed for applying sealant around the vanity edges to create a water-resistant barrier.
- Tape measure: Ensures accurate measurements when choosing a new vanity and positioning it correctly during installation.
- Utility knife: Helps to cut through old caulking or any adhesive holding the vanity in place.
- Spirit level: Ensures the vanity is perfectly level during installation.
- Bucket or pan: Used to catch any residual water when disconnecting plumbing.
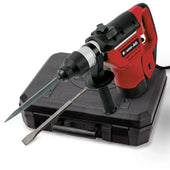
- Cordless drill: Speeds up the process of removing and reinstalling screws, especially for larger vanities.
Materials Needed
- Replacement vanity: The new unit should be measured to fit the bathroom dimensions while suiting any design requirements, such as a freestanding bathroom vanity for a more open look.
- Sealant or caulk: A waterproof sealant is vital for preventing water infiltration around the edges of the vanity.
- Plumber’s tape: Prevents leaks by sealing threaded pipe connections securely.
- Wood shims: Required to stabilise or level the vanity in uneven flooring situations.
- Flexible water hoses: May be needed to replace or connect to existing plumbing, ensuring compatibility with the new vanity.
- Cleaning supplies: These include rags, sponges, and cleaning agents to clean the area before installing the new unit.
- Waste pipes and fittings: Replacement parts might be needed if the current pipes do not fit properly with the new vanity.
Preparation and organisation streamline the installation process. Ensuring all tools and materials are pre-checked provides confidence in tackling the replacement efficiently.
Planning and Preparation Before You Begin
Replacing a bathroom vanity requires careful planning and preparation to ensure a smooth and successful installation. Before starting, it is essential to gather all necessary tools, assess your bathroom space, and make a clear plan to avoid unexpected challenges.
Assessing the Current Setup
Evaluate the existing vanity and surrounding area to understand how it is connected to plumbing and the wall. Examine the dimensions of the current vanity and compare them with the replacement unit to ensure it fits properly. Check for any signs of damage to the wall, floor, or plumbing that might need to be addressed before installation.
Measuring and Choosing the Right Vanity
Precise measurements are a cornerstone of preparation. Use a tape measure to record the height, width, and depth of the space available for the new vanity. Consider aspects like proximity to outlets, plumbing fixtures, and door clearance. Select a vanity design that meets your functional needs and matches your bathroom’s aesthetic, such as a timeless white bathroom vanity or a bold black bathroom vanity, ensuring compatibility with the existing fixtures, including sinks and taps.
Gathering Tools and Materials
Assemble the tools necessary for removing the old vanity and installing the new one. Commonly required items include:
- Screwdrivers
- Adjustable spanner
- Utility knife
- Level
- Caulking gun
- Plumbing tape Additionally, have safety gloves, goggles, and cleaning supplies ready to protect yourself and maintain a neat workspace.
Preparing the Workspace
Clear the area around the vanity to maximise accessibility during the replacement process. Remove all toiletries, storage bins, and decorative items. Lay down a drop cloth to protect the flooring and nearby surfaces from debris, scratches, or water spills.
Proper preparation will save time, reduce stress, and set the foundation for a successful vanity replacement project.
Optional Upgrades and Customisation Ideas
Replacing a bathroom vanity opens the door to various upgrade opportunities and customisation ideas that can elevate the space both aesthetically and functionally. Homeowners can explore features that suit their specific needs, style preferences, and the overall design of the bathroom.
Hardware Selection
Upgrading the handles or knobs can transform the vanity’s appearance without significant costs. Materials such as brushed nickel, antique bronze, or matte black add a sleek or vintage touch depending on the desired look. Soft-close hinges and drawer slides enhance functionality by creating a quieter and smoother experience.
Vanity Tops
Choosing a new vanity top can make a substantial impact on the room’s look. Options such as quartz, marble, or granite provide durability while adding an elegant aesthetic. For those seeking a more economical alternative, laminate or acrylic materials deliver both affordability and versatility in design.
Integrated Sinks
Modernise the vanity by opting for an integrated sink design. Popular styles include vessel sinks, which sit atop the vanity for a bold statement, or undermount sinks, offering a seamless appearance. Paired with designer faucets, the sink can become a central visual feature of the space. Complement the design with a matching bathroom vanity mirror for a cohesive look.


