Introduction to Fabric Headboards
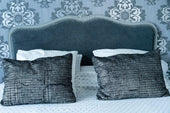
Fabric headboards offer a versatile and stylish solution for enhancing bedroom decor while ensuring comfort and practicality. These headboards can be crafted in various designs, materials, and colours, allowing them to complement diverse interior themes. Typically padded, they provide a soft, cushioned surface ideal for leaning when reading or lounging in bed.
Key features of fabric headboards include:
- Customisability: They can be upholstered in fabrics like linen, velvet, or cotton.
- Aesthetic appeal: Patterns, textures, and tints can amplify the room's visual harmony.
- Functionality: Noise insulation and temperature comfort are added benefits of fabric designs.
When selecting materials, durability, ease of cleaning, and comfort are pivotal considerations.
Benefits of Creating Your Own Fabric Headboard
- Customisation: By designing a fabric headboard, individuals can tailor it to suit personal tastes, interior design themes, and bedroom sizes.
- Cost-effectiveness: Creating a headboard at home often costs less than purchasing a ready-made one, allowing better value for money.
- Unique Design: A handmade headboard ensures originality, offering a one-of-a-kind design that enhances the space's aesthetic.
- Flexibility in Materials: Users can experiment with various fabrics, colours, and patterns to achieve desired textures and visual effects.
- Personal Satisfaction: Engaging in DIY projects like crafting a fabric headboard provides a sense of accomplishment and encourages creativity.
- Repairability: Self-made fabric headboards are easier to alter or repair, enabling long-term use without major costs.
Creating your own fabric headboard combines practicality with artistic expression for a functional yet stylish piece.
Gathering the Tools and Materials
To begin crafting a headboard, one needs to collect the essential tools and materials. This ensures a seamless and efficient workflow. At During Days, the basic tools required include a tape measure, a saw, a power drill, sandpaper, and a staple gun. A screwdriver set might also be necessary for assembling or mounting the headboard later. Additionally, nails, screws, and wood glue will be helpful for securing parts.
For materials, pick a sturdy wood board or plywood as the base. Upholstery foam, batting, and fabric are needed for padded headboards, with fabric scissors for precise cutting. Keep safety gear such as gloves and goggles readily available.
Choosing the Perfect Fabric and Design
Selecting the right fabric and design is essential to creating a headboard that complements a room’s decor while offering durability and comfort. Begin by considering the function and style of the space. For a contemporary look, sleek fabrics like velvet or linen work well, while vibrant patterns or textured materials like tweed suit eclectic or bohemian designs.
When choosing fabric, prioritise durability, especially if the headboard will face regular use. Upholstery-grade fabrics or stain-resistant options provide longer wear. Additionally, opt for designs that align with the room’s colour scheme. Neutral tones are versatile, while bold colours can make a striking statement.
Measuring and Cutting the Base Materials
Begin by determining the desired dimensions of the headboard. Measure the width of the bed frame and add a few extra inches for overhang or decorative effect. Use a tape measure to record the length and height, factoring in personal preferences and the style of the headboard.
Once the measurements are finalised, select a sturdy base material such as plywood or MDF board. Mark the dimensions on the material clearly using a straightedge and pencil to ensure precision.
Use a circular saw or a handsaw to cut the base material along the marked lines. Ensure consistent and smooth cuts to avoid uneven edges, which could affect the assembly and aesthetics.
Constructing the Frame for the Headboard
Constructing the frame forms the backbone of the headboard and requires careful planning and precision. Begin by selecting sturdy wood, such as pine or oak, as the foundation for the frame. Measurements should align with the size of the bed, leaving an allowance for any padding or upholstery.
To assemble:
- Cut the wood to the predetermined measurements using a saw, ensuring clean edges.
- Lay out the pieces on a flat surface to confirm alignment before joining.
- Use wood glue at the joints for initial adhesion, followed by screws or nails for reinforcement.
- Sand the assembled frame to remove splinters and sharp edges.
Handle all tools with care to ensure safety.
Padding and Upholstering the Headboard Base
To begin, lay the wooden base flat on your workspace. Next, cut a piece of foam padding to match the dimensions of the base. Use adhesive spray to secure the foam evenly to the wood, ensuring there are no air pockets or misalignments. For added comfort, choose a foam thickness suited to your preferences.
Once the padding is set, drape your chosen fabric over the base, leaving an allowance of approximately 10 cm on all sides for tucking. Pull the fabric taut, ensuring no wrinkles, and staple it securely to the back of the headboard using a staple gun. Trim any excess fabric carefully.
Attaching the Chosen Fabric to the Frame
To begin attaching fabric, ensure the material is prepped by ironing to remove wrinkles. Lay the fabric flat and position the frame on top, ensuring the design or pattern aligns as desired. The user should start by securing the centre at the top edge, using a staple gun. Pull the fabric taut but avoid over-stretching.
Stapling should follow a sequence: centre-first on all four sides, then move outward evenly along each edge. Corners require folding techniques for smooth finishes—such as pleating or tucking. Regularly check for alignment and tension to maintain an even appearance.
Adding Decorative Finishing Touches
Adding decorative elements enhances the visual appeal of the headboard and provides an opportunity for personalisation. Consider upholstering the surface with fabric or leather, using staples or adhesive for a polished result. Adding tufting can create a luxurious, textured look; apply buttons or covered studs evenly across the surface.
For painted or wooden designs, apply finishing coats, such as varnish or sealant, to protect the material and create a smooth texture. Stenciling or decals offer an easy way to incorporate patterns or designs. Edging trims like moulding, rope, or braid can create a completed design, ensuring the headboard harmonises with the room’s décor.
Installing the Fabric Headboard to Your Bed
To attach the fabric headboard, begin by positioning it against the bed’s frame for alignment. Ensure the headboard is centred and level with the bed. Use a measuring tape to check that both sides are equally distanced from the edges of the frame. Secure the headboard using appropriate fixing methods based on your bed frame type:
- For bolt-on frames: Align holes on the frame and headboard, then insert bolts and tighten.
- For wall-mounted headboards: Use heavy-duty wall brackets, securing them to studs in the wall.
- For clamp-style fixtures: Adjust and tighten clamps around the bed frame for stability.
Ensure all fixtures are tightened securely.
Maintenance and Tips to Keep Your Headboard Looking Fresh
- Dust Regularly: Use a soft cloth or vacuum with a brush attachment to remove dust and debris from the surface. This prevents buildup over time.
- Spot Clean: For fabric headboards, dab stains gently with mild detergent and water. Avoid saturating the fabric. Wood and metal headboards can be wiped with a damp cloth.
- Protect Against Damage: Keep the headboard away from direct sunlight to prevent fading or warping, especially for wooden or upholstered designs.
- Use Protective Covers: Consider using removable and washable covers for upholstered headboards to preserve their appearance.
- Inspect Periodically: Check screws, bolts, and fittings periodically to ensure stability and fix loose connections promptly.
- Avoid Harsh Cleaning Agents: Stick to gentle cleaners to maintain the integrity of the material and its finish.
Conclusion and Creative Inspiration
A self-made headboard offers both personal satisfaction and a chance to tailor the piece to individual tastes. Experimentation with textures—such as velvet, linen, or reclaimed wood—can add personality. Adding unexpected elements like painted accents, tufted cushions, or embedded lighting creates a focal point for the bedroom. Those inspired by eco-friendly designs might use upcycled materials or repurposed doors.
It is essential to see the headboard not just as a functional object but as an artistic canvas. Incorporating colour gradients, bold patterns, or intricately carved designs allows for boundless creativity. Every chosen detail reflects the maker's vision, making every headboard design unique and meaningful.


