Introduction to Evaporative Coolers and Their Maintenance
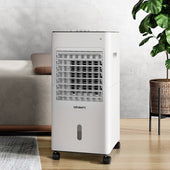
Evaporative coolers, often referred to as swamp coolers, are energy-efficient devices designed to cool indoor spaces by drawing in warm air and passing it through moist pads to produce a cooling effect. During Days evaporative coolers are particularly effective in dry climates due to their reliance on evaporation to lower temperatures. Unlike traditional air conditioners, these units use significantly less electricity and do not require chemical refrigerants.
Proper maintenance is essential to ensure their efficiency and longevity. Neglecting routine care can lead to reduced cooling performance, mineral buildup, and unpleasant odours. Regular cleaning and upkeep help prevent issues, ensuring optimal functionality and indoor air quality.
Why Regular Cleaning of an Evaporative Cooler Is Essential
Regular maintenance of an evaporative cooler is critical for optimal performance and longevity. Dust, pollen, and mineral deposits from water can accumulate on the pads and other components, reducing cooling efficiency and increasing energy consumption. Over time, this build-up can block airflow, leading to poor indoor air quality and unpleasant odours.
Moreover, damp and dirty conditions inside the unit can become a breeding ground for mould and bacteria, posing potential health risks. Regular cleaning also helps prevent rusting and component deterioration, ensuring the cooler functions properly. Proper upkeep extends its lifespan while reducing costly repairs or replacements.
Tools and Supplies You'll Need Before You Begin
Before starting the cleaning process for evaporative coolers, it is essential to have the right tools and supplies. Having these items on hand will ensure efficiency and thorough cleaning:
- Screwdriver: To remove panels and access internal components.
- Soft-bristle brush: For scrubbing away dirt and debris without damaging surfaces.
- Vacuum cleaner with attachments: To remove dust and residue from internal parts.
- Clean cloths or rags: For wiping down surfaces.
- Mild detergent or cleaner: To clean grime without causing corrosion.
- Bucket: For mixing cleaning solutions.
- Rubber gloves: To protect hands during cleaning.
- Garden hose: For rinsing filters and pads effectively.
- Replacement pads (if necessary): To swap out damaged or worn cooling pads.
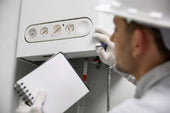
Safety Precautions to Follow While Cleaning
- Turn Off the Power: Ensure the evaporative cooler is completely switched off and unplugged from the power source before commencing cleaning to avoid electrical hazards.
- Wear Protective Gear: Use gloves and safety goggles to protect hands and eyes from chemicals or debris. A dust mask may be necessary if cleaning involves a large accumulation of dirt or mould.
- Handle Electrical Components Carefully: Refrain from using excessive water near electrical parts like the motor or wiring to prevent potential damage or short circuits.
- Ventilate the Area: Open windows or doors if cleaning indoors to ensure proper airflow, especially when using cleaners with strong fumes.
- Use Non-Corrosive Cleaning Agents: Only use cleaning products recommended for evaporative coolers to avoid corrosion or damage to the internal components.
- Check for Stability: Ensure the unit is securely positioned if cleaning takes place at an elevated height or while disassembled.
How to Prepare Your Evaporative Cooler for Cleaning
Preparing an evaporative cooler for cleaning is essential to ensure effective maintenance. Begin by turning off the unit and disconnecting it from the power source to prevent accidents. Locate and remove all detachable components, such as filters, pads, and water reservoirs, following the manufacturer's instructions. Carefully inspect these parts for signs of wear or damage.
Drain any remaining water from the reservoir to avoid splashes or residue during cleaning. Gather necessary cleaning supplies, such as mild detergents, brushes, and a clean cloth. Place absorbent materials around the cooler to catch debris or excess liquid. Ensure proper ventilation for safe handling of cleaning agents.
Step 1: Disconnecting the Power Supply
Before beginning any cleaning process, ensure the evaporative cooler is completely disconnected from its power source. Safety is paramount when working with electrical devices. Identify whether the unit is plugged into an electrical socket or hardwired into the system. For plug-in units, simply remove the plug from the wall socket. For hardwired systems, locate the circuit breaker and turn off the appropriate switch to cut off power.
Double-check that the cooler is not receiving electricity by attempting to turn it on after disconnecting the power. This preventative measure helps avoid potential electrical hazards during cleaning. Always prioritise safety before handling internal components.
Step 2: Removing and Cleaning the Cooler Pads
Carefully remove the cooler pads from the evaporative cooler. They are usually located behind a panel that can be unscrewed or unclipped. Inspect the pads for any visible damage, such as cracks, fraying, or heavy mineral build-up.
To clean the pads, rinse them thoroughly with a garden hose or under running water, ensuring all dirt and residue are washed away. For heavily scaled pads, soak them in a solution of equal parts water and white vinegar to dissolve mineral deposits.
Allow the pads to air-dry completely before reinserting them into the cooler to avoid moisture retention that may lead to mould growth.
Step 3: Cleaning the Water Tank and Reservoir
Ensuring the water tank and reservoir are clean is essential for maintaining an efficient evaporative cooler. Begin by unplugging the cooler to avoid electrical hazards. Drain all the water from the tank and reservoir to remove sediment and stale water. Use a soft cloth or a non-abrasive sponge dipped in a solution of mild detergent and warm water to scrub the interior surfaces.
Pay special attention to corners and areas with visible build-up. Rinse thoroughly with clean water to remove any soap residue. Inspect for cracks or damage, replacing any worn-out components if necessary before refilling. Reassemble securely when finished.
Step 4: Clearing the Pump and Water Distribution System
Maintaining the pump and water distribution system is essential for efficient evaporative cooler operation. Begin by disconnecting the pump from its power supply to ensure safety. Inspect the pump for any debris or build-up that could affect its performance. Use a soft brush or cloth to remove accumulated dirt from the pump housing and impeller.
Next, turn attention to the water distribution tubes. Detach them carefully and flush them with clean water to clear blockages or mineral deposits. A mild vinegar solution can be used for stubborn build-up. Reconnect the tubes securely, ensuring no leaks. Regular maintenance prevents water flow interruptions and improves cooling efficiency.
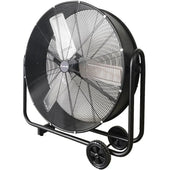
Step 5: Inspecting and Cleaning the Fan Blades
Start by disconnecting the power supply to ensure safety. Remove the protective grill or panel covering the fan blades to access them. Inspect the blades for accumulated dirt, dust, or any signs of damage such as warping or cracks.
To clean, use a soft cloth dampened with warm, soapy water to gently wipe each blade. For stubborn grime, a soft-bristle brush may be employed. Avoid over-saturating the blades with water as this can damage the motor. Once cleaned, dry the blades thoroughly with a lint-free cloth to prevent moisture buildup. Ensure blades are spotless before reassembly.
Step 6: Wiping Down the Exterior and Other Components
Once the interior components are cleaned, attention should turn to the exterior and other parts of the evaporative cooler. Begin by using a soft, damp cloth to wipe down the outer casing of the unit. Remove any visible dirt, dust, or stains that have accumulated. For tougher grime, a mild detergent mixed with water can be applied and then rinsed using a clean cloth.
Ensure the fan blades, grills, and vents are also wiped free of dust or debris. Check for any blocked air passages and address them. Avoid excessive moisture near electronic controls. Let all surfaces air dry completely before reassembly.
Checking for Repairs and Reassembling Your Cooler
Before reassembling the evaporative cooler, inspect all parts for any signs of wear or damage.
- Inspect Pads and Filters: Examine the cooling pads for tearing, thinning, or excessive mineral build-up. Replace worn materials as needed.
- Assess Mechanisms: Check the motor, fan, and pump for proper functionality. Look for loose connections or frayed wires. Tighten screws or bolts where required.
- Examine Hoses and Reservoirs: Ensure water lines are free of blockages and that there are no leaks in the hoses or reservoir.
Once repairs are complete, carefully reassemble the unit, ensuring all parts are securely in place for optimal operation.
Tips to Keep Your Evaporative Cooler Running Efficiently
- Regular Filter Maintenance: Ensure filters are cleaned or replaced periodically to prevent dirt and debris from obstructing airflow.
- Check the Water Levels: Maintain an adequate water supply to allow the cooler to function effectively and prevent damage.
- Inspect for Leaks: Routinely examine water connections and pipes to avoid wastage and inefficiencies caused by leaks.
- Lubricate Moving Parts: Apply lubricant to fan motors and bearings for smooth operation and to reduce wear and tear.
- Monitor Airflow: Keep vents unblocked, ensuring unrestricted circulation for optimal cooling performance.
- Schedule Professional Servicing: Have the system professionally inspected annually to address any hidden issues proactively.
How Often Should You Clean Your Evaporative Cooler?
The frequency of cleaning an evaporative cooler depends on usage, location, and environmental factors. Regular maintenance ensures optimal performance and extends the unit’s lifespan.
- Weekly: Check water levels and cleanliness during peak use. Inspect the cooling pads for dust or mould.
- Monthly: Clean or replace cooling pads based on the manufacturer’s guidelines. Remove mineral buildup from the water reservoir.
- Seasonally: Give the unit a deep clean before and after heavy use. Drain water, scrub components, and examine the water pump and fan.
- Annually: Inspect and service the entire cooler, especially in regions with hard water or dusty conditions.
Adhering to this schedule keeps the cooler efficient and hygienic.
When to Consider Professional Maintenance or Replacement
It may be necessary to seek professional assistance or replace the evaporative cooler under specific circumstances. Indicators include:
- Persistent Odours: Lingering unpleasant smells after thorough cleaning may suggest deep-seated mould or bacterial growth.
- Unusual Noises: Grinding or rattling sounds during operation often point to failing components.
- Reduced Efficiency: Noticeable decline in cooling effectiveness despite regular upkeep could imply worn-out parts or improper function.
- Visible Corrosion or Damage: Extensive rust, leaks, or structural issues could signify that the unit is beyond repair.
These scenarios highlight when professional maintenance or upgraded replacement might ensure optimal performance and hygiene.
Conclusion and Final Thoughts on Maintaining Your Cooler
Proper maintenance ensures evaporative coolers function efficiently and last longer. Regular cleaning prevents mineral build-up, mould, and unpleasant odours, all of which can affect performance. Key practices include cleaning the cooler pads, inspecting and scrubbing the water reservoir, and ensuring fan blades remain dust-free. Additionally, always check for worn parts and replace them promptly to avoid further damage. Following seasonal maintenance schedules, particularly before and after heavy use periods, is also vital. Regular upkeep not only improves cooling effectiveness but also promotes healthier air quality, making the environment more comfortable for occupants.